Working with Photoshop
Assignment: Create a story using atleast 5 photos and edit atleast 3 of the photos. Work in teams.
Ray and I discussed how we were going to work this out and it was decided that one of us takes the five photos and the other person will make up a story about them. I only told Ray that the photos will involve Greenie so it will be interesting to see what story he made up to go with the pictures I sent him. In the meantime, I actually editted my own photos and placed the story I had in mind together.
All of the photos needed color work and resizing. In addition, I added a bit of a vignette to each photo to give them a more aged/old-timey look.
Here are the steps that I took:
1- Take photos.
2- Bring into photoshot and auto level.
3- Apply saved action called “lomo-ize” which was found from a Flickr discussion board.
3a. File: Open: the picture you want
3b. Image: Adjustments: Brightness/Contrast: increase contrast by 20
3c. Image: Adjustments: Hue/Saturation: increase saturation by 20
3d. Choose the Rectangular Marquee Tool (your basic selection tool)
3e. Change feather amount to 1/12 the width of your picture (if your picture is 600px wide then you will set your feather to 50px)
3f. Select your entire picture note: using select: all, will not work
3g. Select: Inverse
3h. Layer: New: Layer
3i. Change your primary color to black. Fill the selection (on the new, blank layer).
3j. Change the blend mode of this layer to Overlay
3k. Layer: Duplicate Layer
3l. Now select your base layer (the one with the picture on it).
3m. Layer: New: Layer
3n. Change your fill tool to Gradient
3o. Change your Gradient Type to Spherical
3p. Change your Gradient Shading Style to "foreground to transparent" (I believe this is the default).
3q. Change your primary color to white.
3r. With the fill tool selected, click in the middle of the picture, and drag the line out to the farthest edge of your picture (if it's a portrait, use top or bottom, if landscape, use left or right).
3s. Change the blend mode of this layer to Overlay
3t. Change the Opacity of this layer to 40% (or whatever you see fit)
4- Reduce the size
5- And save.
Here is a look at the before and after.
Here is a look at the final product.
And because I can't leave well enough alone...here's another little Photoshop project I worked on:
I began with the final photo from my Greenie montage and fixed some color.

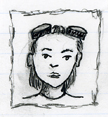
Then I looked through my archived photos and found this:

I cut out the kid and pasted into the same document as greenie, duplicated the layer and move behind the original, selected the new layer and filled with black, faded the layer to a shadow, and then rotated to about the same angle as Greenie's shadow. Then you get this:

Ray and I discussed how we were going to work this out and it was decided that one of us takes the five photos and the other person will make up a story about them. I only told Ray that the photos will involve Greenie so it will be interesting to see what story he made up to go with the pictures I sent him. In the meantime, I actually editted my own photos and placed the story I had in mind together.
All of the photos needed color work and resizing. In addition, I added a bit of a vignette to each photo to give them a more aged/old-timey look.
Here are the steps that I took:
1- Take photos.
2- Bring into photoshot and auto level.
3- Apply saved action called “lomo-ize” which was found from a Flickr discussion board.
3a. File: Open: the picture you want
3b. Image: Adjustments: Brightness/Contrast: increase contrast by 20
3c. Image: Adjustments: Hue/Saturation: increase saturation by 20
3d. Choose the Rectangular Marquee Tool (your basic selection tool)
3e. Change feather amount to 1/12 the width of your picture (if your picture is 600px wide then you will set your feather to 50px)
3f. Select your entire picture note: using select: all, will not work
3g. Select: Inverse
3h. Layer: New: Layer
3i. Change your primary color to black. Fill the selection (on the new, blank layer).
3j. Change the blend mode of this layer to Overlay
3k. Layer: Duplicate Layer
3l. Now select your base layer (the one with the picture on it).
3m. Layer: New: Layer
3n. Change your fill tool to Gradient
3o. Change your Gradient Type to Spherical
3p. Change your Gradient Shading Style to "foreground to transparent" (I believe this is the default).
3q. Change your primary color to white.
3r. With the fill tool selected, click in the middle of the picture, and drag the line out to the farthest edge of your picture (if it's a portrait, use top or bottom, if landscape, use left or right).
3s. Change the blend mode of this layer to Overlay
3t. Change the Opacity of this layer to 40% (or whatever you see fit)
4- Reduce the size
5- And save.
Here is a look at the before and after.
Here is a look at the final product.
And because I can't leave well enough alone...here's another little Photoshop project I worked on:
I began with the final photo from my Greenie montage and fixed some color.

Then I looked through my archived photos and found this:

I cut out the kid and pasted into the same document as greenie, duplicated the layer and move behind the original, selected the new layer and filled with black, faded the layer to a shadow, and then rotated to about the same angle as Greenie's shadow. Then you get this:

posted by -ellie. at
11:08 PM
![]()